I didn't order a Nighthawk brake stay bar to secure the drum brake panel from moving under braking and the CB750c bar was too long so I bought some flat bar stock from Home Depot and painted it. Looks it it will work. I'm using the adjustable brake rod from the CB750c and the length looks like it will work fine.
I thought I was done until I remembered I still need to attach my new seat, wire up the lighting and relocate the battery. Still lots of stuff to tackle before I can ride.
I got carried away with my new angle grinder and after a day of chopping, smoothing and shaping, I was almost ready to create and install the battery tray I had made.
I fashioned the tray from cardboard to get an idea of what the bends would look like and how much metal I needed to purchase but ended up downsizing slightly just to fit within the smaller sheet of 22gauge steel that was for sale at the local tractor store.

I also need to find a place for the license plate. The end of that electronics tray seems like a good location, but after the bike is off the center stand and the suspension is compressed with me sitting on it, I'm fairly certain that the tag will not be visible to LEO (law enforcement officer).
Although the cops in my area probably won't bother me about it, I figure it's better to not give them a reason to stop me especially since I'm no longer running an 'essentially unmodified' bike with my antique plates.
I cobbled together a plate mount using some perforated steel and the old tail tidy I found in a box containing left over parts. This came from my Triumph Street Triple and I have no idea why I kept it, but it came in handy.
I like how it turned out. It's mounted to the hoop with 4 rivets and 2 zip ties but I think I may have clearance issues. The shocks have roughly 2.7" of travel, and the clearance on the center stand is 3.5" so the shock should hit the bump stops before the tire hits the tag.
Design consideration:
Most cafe/brat builders attempt to minimize their bikes with minimal protrusions and simplified wiring. I'm using an integrated LED brake light with turn signals, so I don't really need to have those rear turn signal stalks, but safety and visibility are important to me. I got this set of turn signals from Amazon (already NLA). The front signals have daytime running lights, the rear signals have brake lights that flash when the brakes are applied and all four have sequential (water fall) LEDs for turning.
I can't run lower handlebars like most other cafe/brat builds because I have a bulging disk in my back that I don't want to aggravate, Carpal Tunnel that makes my hands go numb, and an old fracture at the base of my right thumb which bothers me fairly frequently.
Taking my time during the corona virus quarantine and mostly working only on weekends, I finally got everything back together late on a Sunday evening. Just to check things out, I turned on the ignition to test the brake lights and turn signals but thought they are wired wrong. Running lights are brakes. I thought I needed to reverse the signal wires because I got running lights and brakes reversed. After cutting the wires and testing, I found that the rear brake switch was sticky and the wiring was right. I should have saved myself the trouble and checked the switch first.
After that, a thorough safety check and a wash to get all the grinding dust off.


 |
| 150 vs 130 tire comparison |
I got carried away with my new angle grinder and after a day of chopping, smoothing and shaping, I was almost ready to create and install the battery tray I had made.
I fashioned the tray from cardboard to get an idea of what the bends would look like and how much metal I needed to purchase but ended up downsizing slightly just to fit within the smaller sheet of 22gauge steel that was for sale at the local tractor store.

 |
| Zero welding experience, but I cut the frame anyway. |
I also need to find a place for the license plate. The end of that electronics tray seems like a good location, but after the bike is off the center stand and the suspension is compressed with me sitting on it, I'm fairly certain that the tag will not be visible to LEO (law enforcement officer).
Although the cops in my area probably won't bother me about it, I figure it's better to not give them a reason to stop me especially since I'm no longer running an 'essentially unmodified' bike with my antique plates.
I cobbled together a plate mount using some perforated steel and the old tail tidy I found in a box containing left over parts. This came from my Triumph Street Triple and I have no idea why I kept it, but it came in handy.
 |
| Extra metal to reinforce the bend and a bracket from a Street Triple tail |
 |
| Think I won't have enough clearance off the center stand |
I like how it turned out. It's mounted to the hoop with 4 rivets and 2 zip ties but I think I may have clearance issues. The shocks have roughly 2.7" of travel, and the clearance on the center stand is 3.5" so the shock should hit the bump stops before the tire hits the tag.
 |
| Tag lights, brake lights, & rear turn signals wired. Still need work on front signal, bike ground and wire up the battery. |
Most cafe/brat builders attempt to minimize their bikes with minimal protrusions and simplified wiring. I'm using an integrated LED brake light with turn signals, so I don't really need to have those rear turn signal stalks, but safety and visibility are important to me. I got this set of turn signals from Amazon (already NLA). The front signals have daytime running lights, the rear signals have brake lights that flash when the brakes are applied and all four have sequential (water fall) LEDs for turning.
I can't run lower handlebars like most other cafe/brat builds because I have a bulging disk in my back that I don't want to aggravate, Carpal Tunnel that makes my hands go numb, and an old fracture at the base of my right thumb which bothers me fairly frequently.
Taking my time during the corona virus quarantine and mostly working only on weekends, I finally got everything back together late on a Sunday evening. Just to check things out, I turned on the ignition to test the brake lights and turn signals but thought they are wired wrong. Running lights are brakes. I thought I needed to reverse the signal wires because I got running lights and brakes reversed. After cutting the wires and testing, I found that the rear brake switch was sticky and the wiring was right. I should have saved myself the trouble and checked the switch first.
After that, a thorough safety check and a wash to get all the grinding dust off.

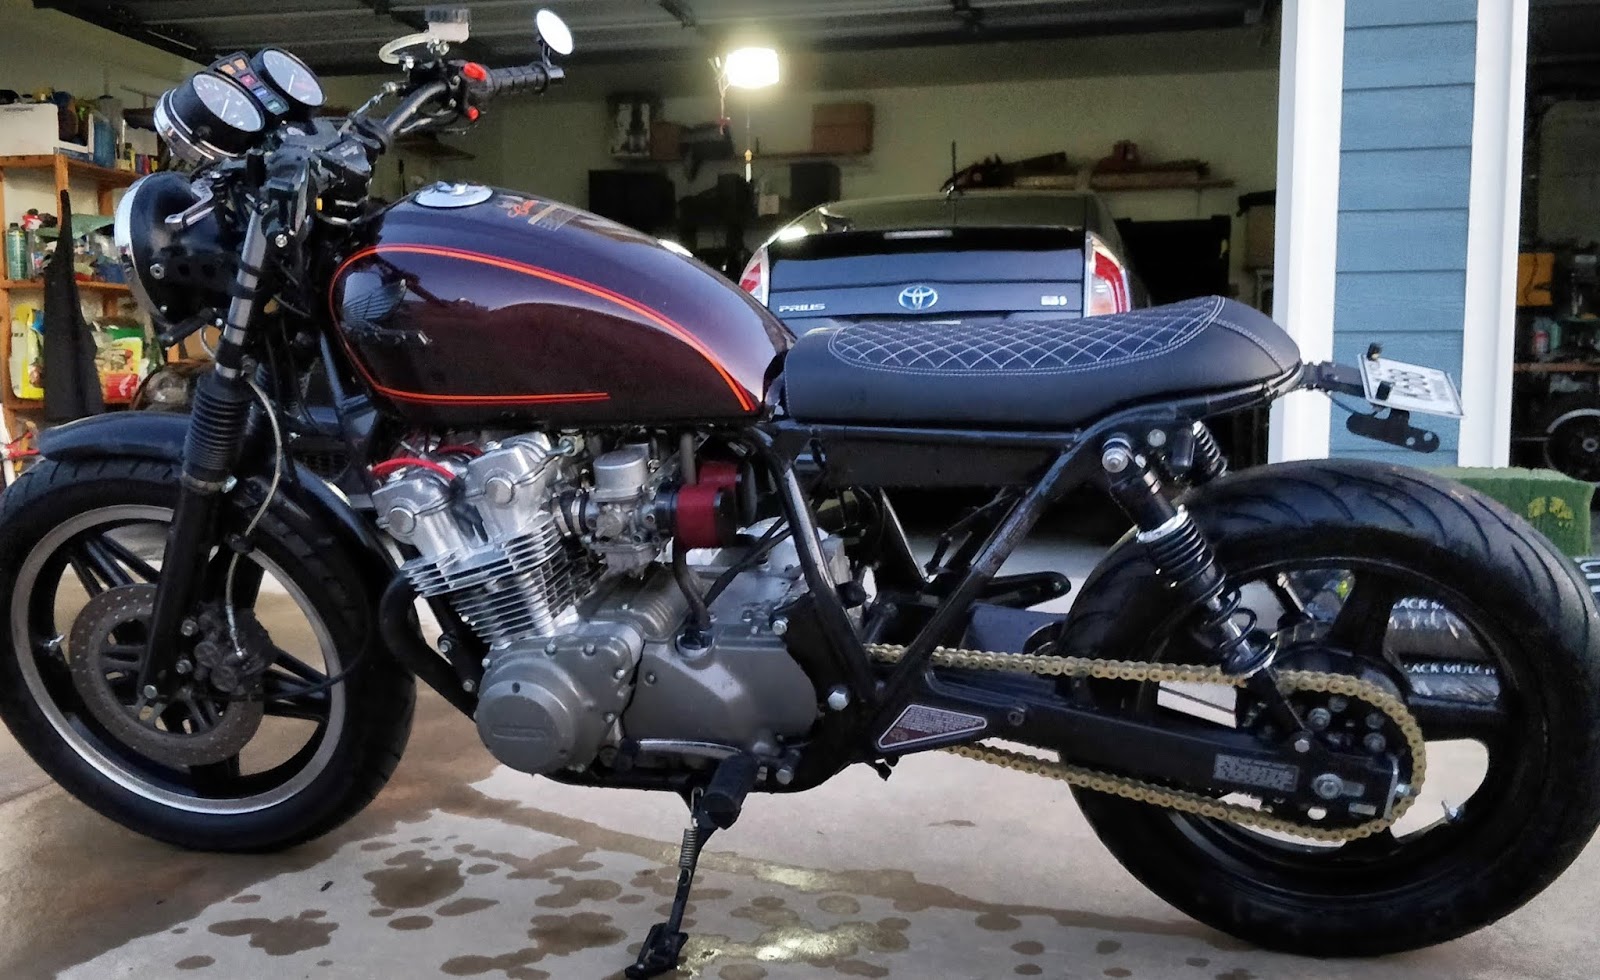
That seat is from Texavina and worth every penny as well as the month long wait to get through customs from Vietnam. I had to learn to weld the frame hoop as well as 2 brackets for the seat. I tried to just do one bracket but the front pivoted on the gas tank bolt and I didn't like the rocking motion of the seat when I sat on it to walk the bike out of the garage so I welded the front bracket on to hold it up a little higher even though I don't have access to secure the seat at the front location due to the battery tray.
I'm using a threaded stud to locate the seat in a hole in the front bracket as well as the OE hook under the tank but only using 2 butterfly nuts by the shocks to hold the seat in place.
Comments
Post a Comment